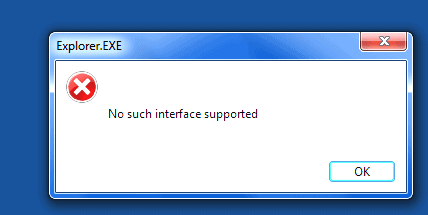
How To Solve “No Such Interface Supported” Error
The guide below has been created to help users get the “No Such Interface Supported” error solved. The guide is designed to work on all Windows OS types. We hope you will find the solution to your issue here in our article. In case you do not find it here, however, and have found it somewhere else, please share your experience with us. We will be happy and grateful to improve our article.

Methods to get “No Such Interface Supported” Error fixed
The matter discussed here – ‘No such interface supported’ error, could occur whenever a Windows user tries to load/run a program or an app. Most commonly, the affected by this issue apps are the ones created by Windows itself – for instance, Windows Explorer {explorer.exe}. Still, the problem may affect numerous third-party pieces of software. However, in our opinion, if the error has affected a Windows built-in program or application, the consequences are much more difficult to resolve, and dangerous to your system. In fact, it may be terrifying not to be able to access Control Panel, Documents or Computer.
The reasons for the ‘No such interface supported’ error notification to appear may be extremely diverse. That is why we have prepared the following potential fixes, no matter what the source of the problem is.
Method #1: Just check your PC for malware-based programs and other infections
Usually, the cause for such an error message might be a contamination with various kinds of malicious programs. Consequently, one very powerful tool against this error is to simply check for an infection with your anti-virus program and after that, deal with the contamination, according to the options that your anti-malware tool provides.
Method #2: Maybe you need to register a specific DLL associated with this problem again
- Launch the Start Menu.
- Look for “cmd”.
- Select the search result called cmd.
- Choose Run as administrator from the context menu.
- This is how an elevated Command Prompt will be loaded.
- Enter the command you see here into the elevated Command Prompt. Continue with Enter: regsvr32 c:\windows\system32\actxprxy.dll
- Wait until this command is applied. Shut down the elevated Command Prompt once the process is completed.

- Reboot your machine. Check to see whether the error message will appear again.
Method #3: Try the following in case the methods above do not work for you
- Push the Windows Logo key and the R key to launch a Run window.
- Write regsvr32 actxprxy.dll. Push Enter.

- Once the process is done, reboot your device. See whether the problem will no longer come up.
Method #4: A System Restore might solve the problem
Sometimes nothing else will work and you will need a full System Restore. By doing so, you will turn your PC back to the exact state it used to be in, at the moment when the restore point you choose to recover to was established. Perform a System Restore in the following way:
- Launch a Run
- Write exe there. After that hit Enter to access the System Restore utility.
- Go with Next. In case System Restore demands that you recover your PC to an automatically chosen point, go with Choose a different restore point and then continue with Next.
- Choose your desired restore point from the list and select Next.
- When you see the Confirm your restore point screen, go with Finish.
- Push Yes in the dialog box which later pops up to launch the System Restore.
Windows will reboot and start the restoration of the computer to the chosen restore point. The process might require some time. Please be patient.
Leave a Reply