Fixes for error code 0x80073712
This guide is created to help you solve the error code 0x80073712 issues and upgrade your Windows OS. We hope you find them helpful and they will fix your problem.
Microsoft is trying hard to improve its new Windows 10 version and is constantly releasing updates that offer patches and fixes to various issues. Getting your hands on Microsoft’s latest Operating System may be exciting, however, some users may experience problems with upgrading and installing its updates. Error code 0x80073712 is one such issue, which indicates a problem with a damaged or missing file, needed by Windows Update, which may prevent you from successfully installing the latest updates for Windows 10.

What Microsoft is saying about 0x80073712
A list of potentially useful fixes for the 0x80073712 error can be found on Microsoft’s support page. Here is what the company’s experts suggest you to try:
- Reset your Windows Update components. Windows 7 and Windows 8 users can do this when they run the Fixit tool. It can be found on this Microsoft webpage. Look for the Microsoft Fixit graphic under “Windows 8.1, Windows 8, and Windows 7” versions and simply click the “Run now” button.
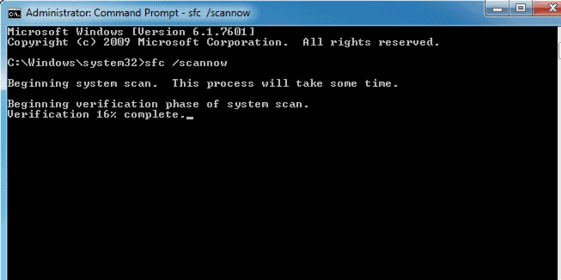
- Repair damaged Windows files with System File Checker. The System File Checker is another tool that may help you fix error 0x80073712 in case that a file in your system has been damaged. You can find the detailed instructions on how to use the tool on Microsoft’s website. Simply follow the steps and you should be good to go.
- Run the DISM tool (for Windows 8) or System Update Readiness Tool (for Windows 7) to fix corruption errors. The DISM tool works for Windows 8 and higher versions, but if you are using Windows 7, you will need to download and install the System Update Readiness tool. There are detailed instructions for both these methods on the Microsoft website.

Other fixes for 0x80073712 error code:
Some users have reported that they have managed to install the updates through a USB stick instead of using the Windows Update. For that, you will need an empty USB (or DVD) with at least 3GB of free space. To install the updates, go to Microsoft’s website and download the media creation tool. Then simply follow the instructions under “Upgrade to Windows 10”.
- First, run the media creation tool
- Next, select the option “Create installation media for another PC”
- Then, choose your language, edition, and architecture.
- A wizard will guide you through the steps to create the media. At the end select “Finish”.
- When your media is ready, insert your USB drive (or DVD) into the computer you want to upgrade and select setup.exe.
- After the upgrade starts, make sure to remove the USB drive (or DVD) before the installation restarts your device for the first time.
Run the Windows Update troubleshooter
- First, from your Start menu, type “Troubleshooter” in the search box
- Go to the Windows Update Troubleshooter and click on it to open.
- Next, navigate to “System and Security” and under it click on “Fix problems with Windows Update”.

- The wizard will guide you through the troubleshooting process.
- When its is done, open Windows Update and try to install the update again.
- The error should be gone.

Refresh your PC
Reinstalling Windows will recover any files that have been corrupted or missing, however, this is a bit too harsh of an option, since it will wipe out any programs that you have installed from outside the Windows Store. The good thing is that if you keep your OS on a separate partition, it will retain your personal folders such as Pictures, Documents, Projects, etc. Microsoft’s website has the instructions on how to do that.