The article below will help you get your stuck Windows Update issue resolved. The guides attached are supposed to work for all versions of Windows.

The error we are discussing at the moment – your Windows Update being unable to install a s given update, is becoming more and more common.
Solution #1: Try using the Windows Update Troubleshooter
Sometimes Microsoft’s own built-in instrument might help you get this error solved. What this troubleshooter does is to:
- Terminate Windows Update Services.
- Give a new name to theC:\Windows\SoftwareDistribution folder to C:\Windows\SoftwareDistribution.old. In this way your Windows Update download cache is cleared and could start all over again.
- Reboot the Windows Update Services.
In order to run this Windows instrument, do the following – select Start, look for ‘troubleshooting’.
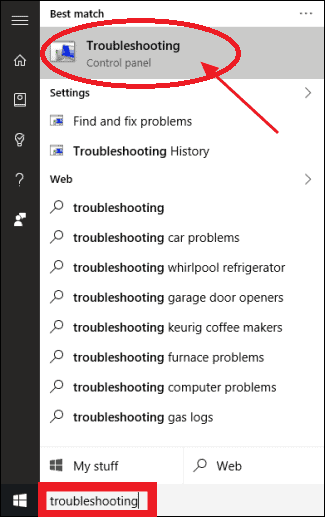
After that you should load the displayed selection.
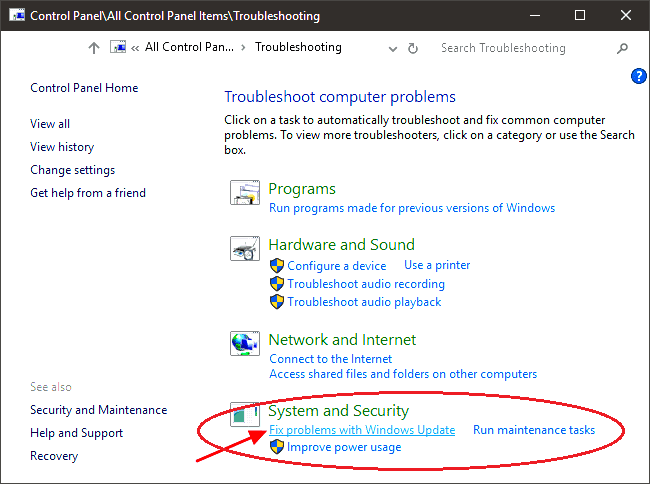
From the ‘System and Security’ part of the generated list of troubleshooters, choose ‘Fix problems with Windows Update’.
In the newly displayed window, hit ‘Advanced’.
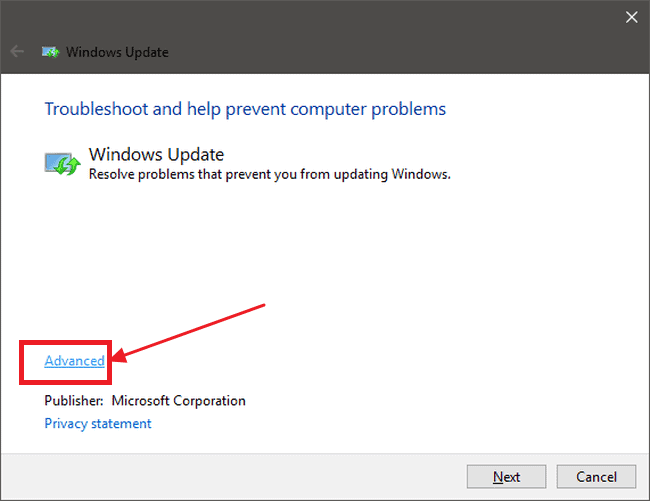
Once there you should enable ‘Apply repairs automatically’.
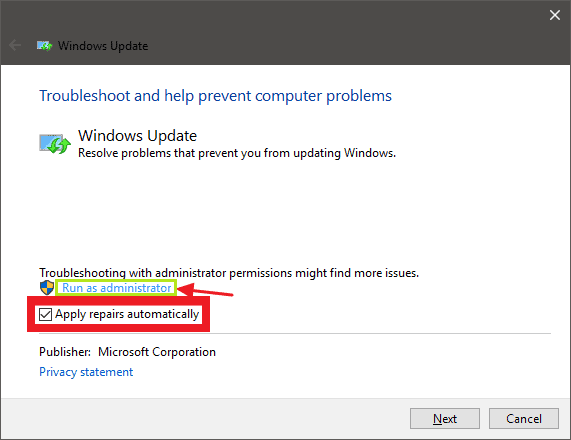
After that select ‘Run as administrator’. Proceed with Next. It is important to grant administrative privileges to this tool to enable it to delete files in the download cache.
In most of the cases, this troubleshooter is able to successfully remove a stuck update from the queue. After running it, you should try running Windows Update again to check whether the problem has been solved.
Solution #2: Maybe you need to delete the Cache of Windows Update in a manual way
Maybe the steps above do not work in your case. For that purpose we suggest that you try the ones below.
- Begin with starting Windows into Safe Mode. The easiest way to do that is to push “F8” while your PC is booting. The boot menu will be displayed and there you will see a “Safe Mode”
- Once you have completed that step – terminate the Windows Update service.
- To do that, load the Command Prompt. For that purpose, launch the Start menu, seek ‘Command Prompt’. Click on its shortcut. Also, you can access it in the following way: Start -à All Programs à Accessories à Command Prompt.
- Once into the Command Prompt, enter the command After that push Enter to shut down the Windows Update service.
net stop wuauserv - Then you need to leave the Command Prompt window open.
- The next step is to load a File Explorer window. From there go toC:\Windows\SoftwareDistribution.Get rid of all the data in this folder.
- Then reboot Windows Update.
- Next go back to Command Prompt.
- Once there, enter the command below and go with Enter:
net start wuauserv
After that all you need to do is to restart your system in the normal mode and give another chance to Windows Update to see whether the issue has been resolved.
For users of Windows 7: Maybe updating the Windows Update Service will be what you need
This could easily be done with the help of the Microsoft’s Convenience Rollup. This actually represents a bundle of a great number of updates that could take a long time to get installed. Via the rollup, though, they will be installed in a faster way.
Dear, users, don’t forget to let us know what worked and didn’t work for you. We are trying to constantly update our guides and articles.